If you’ve ever wanted to make your greeting cards truly stand out, a custom embosser for cardstock could be your new best friend. By lightly pressing your design or monogram onto thick paper, you add a textured, professional touch you’d normally see in store-bought cards. The good news is, it only looks complicated. Once you have the right tools and a bit of know-how, you can turn plain sheets of cardstock into eye-catching masterpieces.
Engineer Seal Stamps (ESS) has been helping people take on creative projects like this since 1964. They offer super quick turnaround on custom stamps and seals, plus stellar customer service if you have any questions along the way. Ready to explore everything you need to know about embossing your cards? Let’s dive in.
Understand The Basics
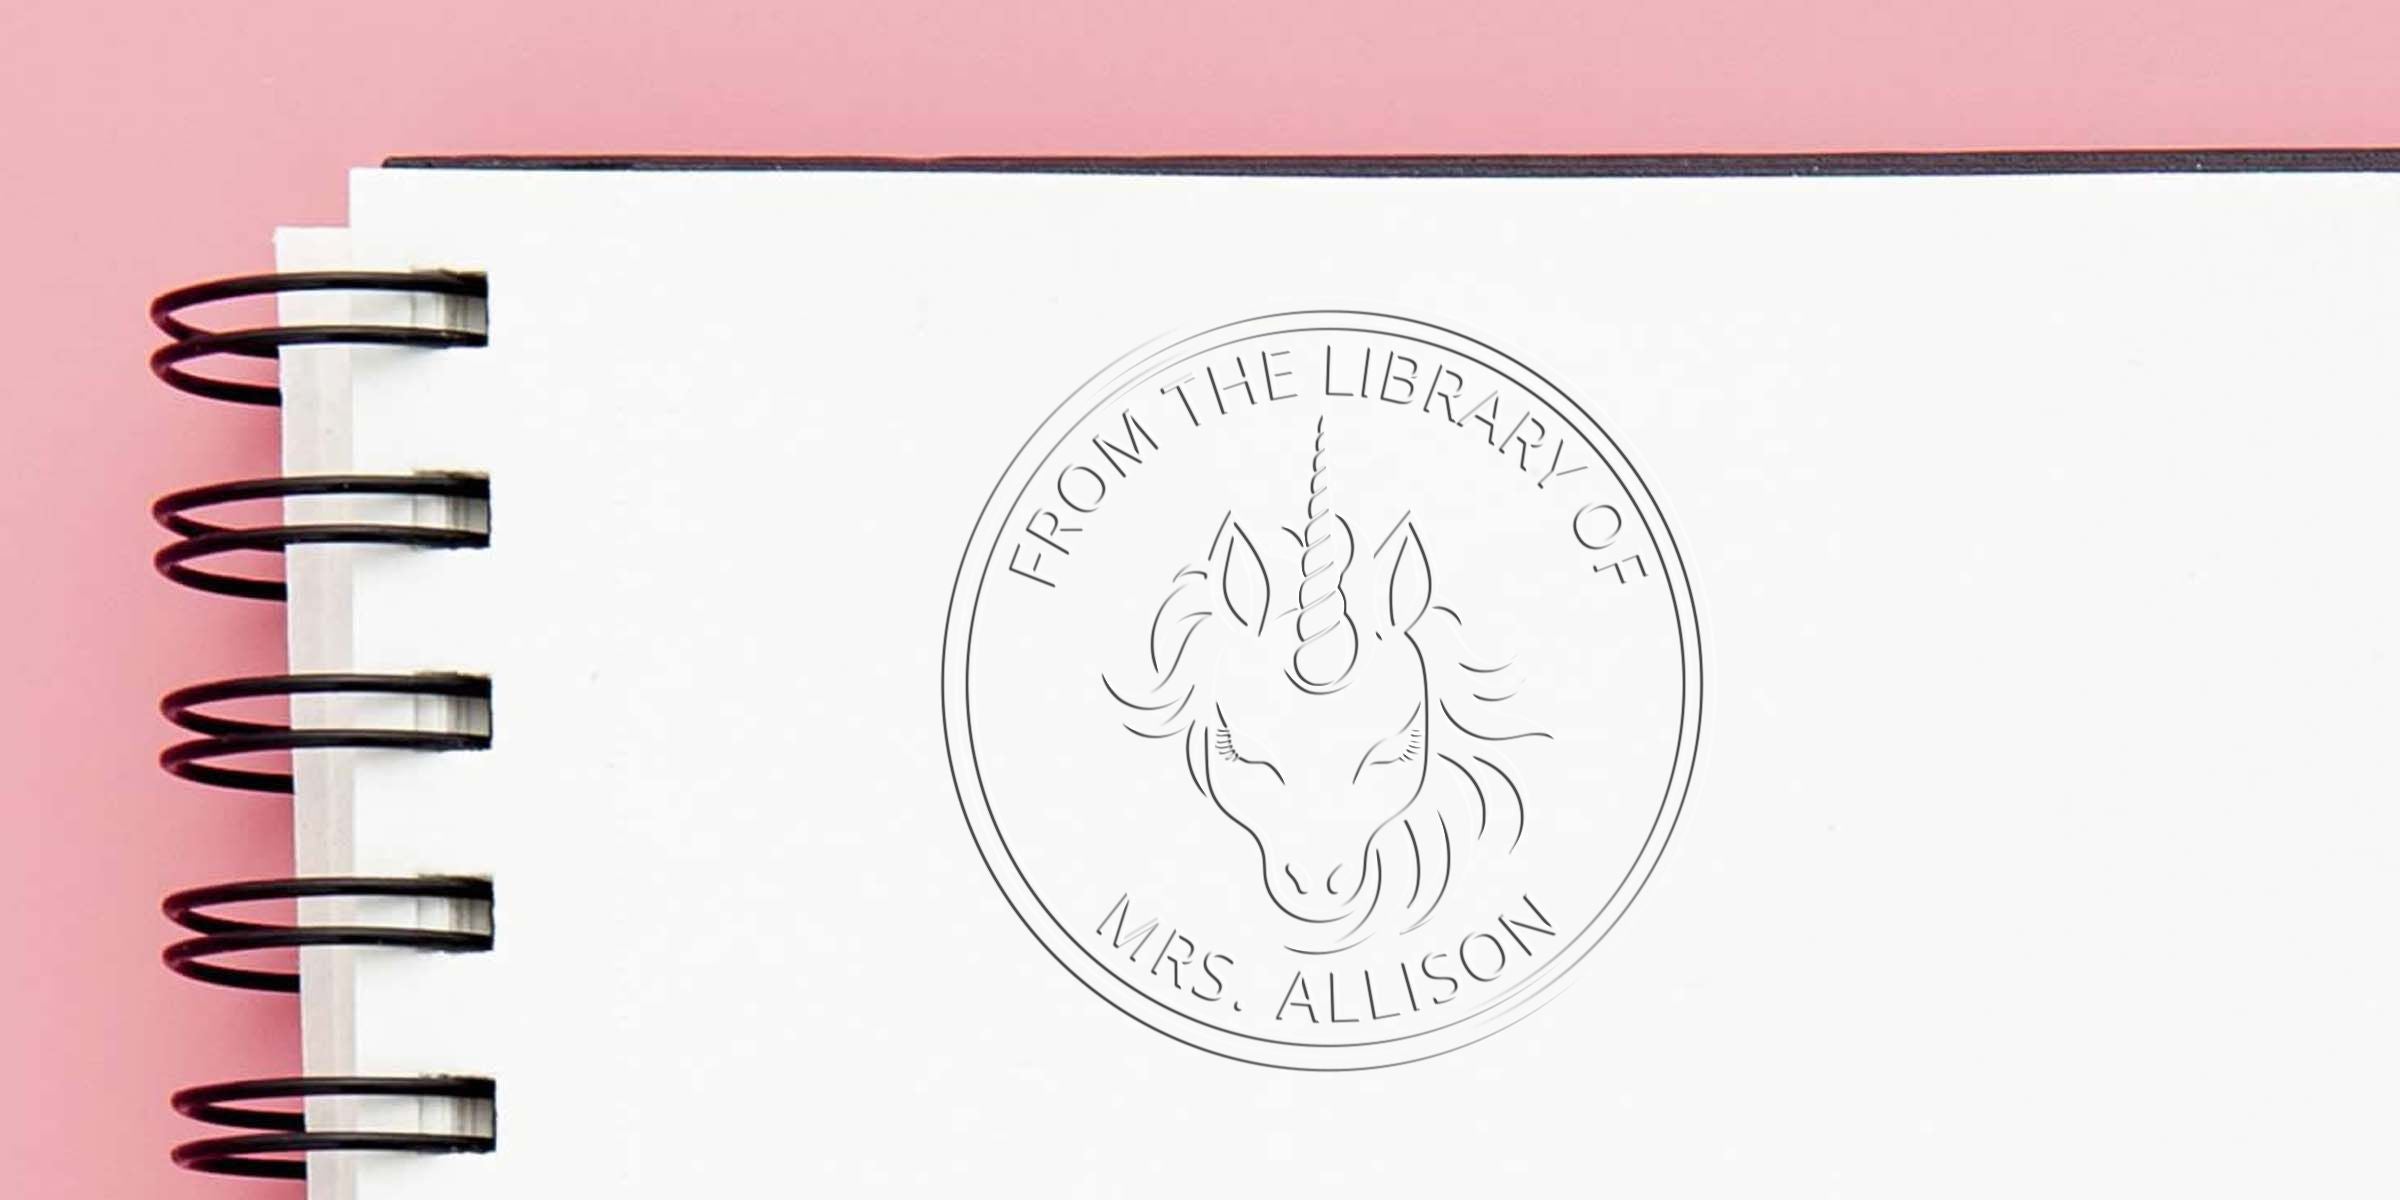
Embossing is the process of creating a raised pattern on paper by pressing it between two matching plates, also known as dies. When it comes to cardstock, you’ll want a thickness sturdy enough to showcase the design but not so thick that the embosser struggles. The sweet spot is often medium to heavy cardstock, around 80 to 110 pounds in weight.
- Thickness Tip: Test a small piece of cardstock first to see if your design comes out clearly.
- Design Possibilities: You can emboss monograms, quotes, flowers, geometric patterns, or even your personal brand logo.
If you ever plan to personalize your books, an ex libris embosser can produce a similarly raised effect on book pages. The principle is the same: your custom plates press into the paper, leaving a crisp impression of your chosen design.
Plan Your Card Design
Before you jump into embossing, it’s a good idea to map out your layout. Are you aiming for a minimalist look or a playful, detailed design? Think about the occasion, whether it’s a birthday or a holiday greeting. Sketching a quick blueprint keeps you from accidentally embossing these designs in the wrong spot.
Choosing A Design Focus
- Logos or Monograms: A monogram embosser can be used for your initials or family crest.
- Personalized Messages: If you love adding your name or a short phrase, a custom embosser is ideal.
- Themed Icons: For special occasions like weddings or anniversaries, you might try hearts, rings, or flowers.
Positioning The Embossed Area
- Centered: Perfect for an impactful, clean look.
- Corner Placement: Ideal if you’re layering additional elements such as ribbons or stickers.
- Border Embossing: Go around the edge of the cardstock to frame your design.
By putting a bit of thought into your layout upfront, you’ll save time and resources later. It also ensures a polished final product.
Use The Right Tools
A successful embossing project requires a few must-haves. First, you’ll need your custom embosser for cardstock. Then, gather supportive materials:
- Cardstock: Aim for a finish that complements your design, such as matte or lightly textured stock.
- Embosser Plates: These contain your custom pattern. If you’re exploring different types of personalized designs, a personalized embosser can mix and match plates.
- Scratch Paper: Practice on a couple of extra sheets to get a feel for how much pressure is needed.
- Ruler And Pencil: Ensures precise alignment and helps you mark exactly where you want the design.
Engineer Seal Stamps (ESS) Quality
ESS has decades of experience crafting embossers that are both sturdy and ergonomically designed. Whether you’re looking for a general-purpose custom embosser or something specialized like a monogram embosser, you can count on both reliability and clarity in your final impressions. Plus, they offer quick shipping, so you can start decorating those cards sooner rather than later.
Master Embossing Techniques
Embossing can seem intimidating at first, but the initial learning curve is actually pretty short. Let’s walk through a typical embossing sequence:
- Place The Cardstock: Open your embosser and align the edge of the paper with any guiding marks on the device.
- Double-Check Alignment: If you’re going for a centered design, measure each side with a ruler to confirm.
- Apply Firm, Steady Pressure: Gently squeeze so the top and bottom plates come together. This action forms the raised pattern on your cardstock.
- Release And Admire: Lift the handle and remove your newly embossed piece.
Common Embossing Pitfalls
- Misalignment: If you find your designs leaning or crooked, mark guide lines on your cardstock lightly in pencil.
- Overly Thick Paper: Heavy cardstock might require a heavier-duty embosser. If you’re concerned about thickness, you can look into a book embosser for thick paper.
- Light Impressions: This usually means you didn’t apply enough pressure or your dies are worn. Contact ESS if you suspect an issue with your embosser plates.
A little practice goes a long way. Once you get the hang of it, embossing cards becomes as natural as signing your name.
Explore Creative Embosser Uses
While greeting cards might be your main target, don’t feel limited. Your custom embosser for cardstock can be used for bookmarks, event invitations, and even gift tags. If you’d like to give a thoughtful present to a fellow book lover, consider pairing your creation with a personalized embosser. Nothing says “I put real thought into this” like a beautifully embossed bookmark or a set of handmade greeting cards.
Varied Applications
- Wedding Invitations: A romantic flourish embossed on the corners sets an elegant tone for the big day.
- Baby Showers: Tiny footprints or playful icons look adorable embossed on pastel cardstock.
- Holiday Cards: Snowflakes and wreaths embossed in metallic ink can make your season’s greetings shine.
- Handcrafted Items: Combine your embossed pattern with a handmade by embosser to sign off each creation.
There’s plenty of room to experiment. If you love your design, save the plates for future projects. You might emboss a matching set of stationery or use the pattern for decorative signage at events.
Care And Maintenance
Embossers are fairly low maintenance, but a little TLC can extend their life and keep your impressions crisp. Most day-to-day upkeep involves keeping your embosser clean and storing it properly.
- Wipe Down After Each Use: A simple microfiber cloth removes any paper dust or residues.
- Store In A Dry Place: Moisture can warp metal components over time.
- Check For Plate Wear: If you notice fading or uneven impressions, examine your plates for signs of damage.
Should you need to replace the plates or adjust tension, ESS’s stellar customer service can guide you. They’ve been at this for more than 60 years, so even if you run into a rare snag, they’ll know how to fix it quickly.
Conclusion And Next Steps
Embossing your own cards adds a personal flourish that’s hard to beat. Whether you’re creating a birthday note for a friend or launching a small business project, a custom embosser for cardstock allows you to imprint a unique signature on every piece. Plus, it can double as a creative gift for crafty friends or book enthusiasts.
Don’t forget: if you have specialized needs, like wanting to emboss thicker paper stock or a special design for your personal library, check out ex libris embosser and other options from Engineer Seal Stamps. They offer a wide variety of embossers suited for just about every task, and their quick turnaround lets you jump into your project almost immediately.
Now that you have the basics, you can start imagining all the possibilities. From wedding invites to DIY party favors, your embosser has the power to transform an ordinary sheet of cardstock into a keepsake. Grab your supplies, sketch out your design, and let the creativity flow.
Frequently Asked Questions
1. How Do I Choose The Right Cardstock For Embossing?
Heavier cardstock (80 to 110 pounds) typically works best, as it holds the embossed design without tearing. However, if you opt for ultra-thick card or textured paper, test a small section first or consider a heavy-duty book embosser.
2. Can I Emboss On Materials Other Than Cardstock?
Yes. You can emboss on pages of your favorite books, vellum stationery, or even envelopes. Just ensure your embosser is designed for that specific thickness so you get a clean impression.
3. Do I Need Special Plates For Different Designs?
You will need separate plates for each unique pattern. You can start with a custom embosser that features your monogram or a simple graphic. If you’d like to branch out later, you can always order additional plates from ESS.
4. Is Embossing Hard To Learn?
No. Once you understand alignment and pressure, it’s pretty straightforward. Practicing a few times on scrap paper will help you feel more confident before working on your final project.
5. How Can I Keep My Embosser Working Smoothly?
Wipe it down after each use and store it somewhere dry. If you notice any wear on the plates or unusual resistance, reach out to ESS for expert guidance. Their customer service team has more than six decades of experience and can help you troubleshoot any hiccups.
Now you’re all set to create beautiful, embossed cards that showcase your personal style. Whether for heartfelt notes, party invitations, or design projects, a custom embosser for cardstock is a fantastic tool that can elevate your papercraft game. Have fun exploring all the artistic possibilities!
