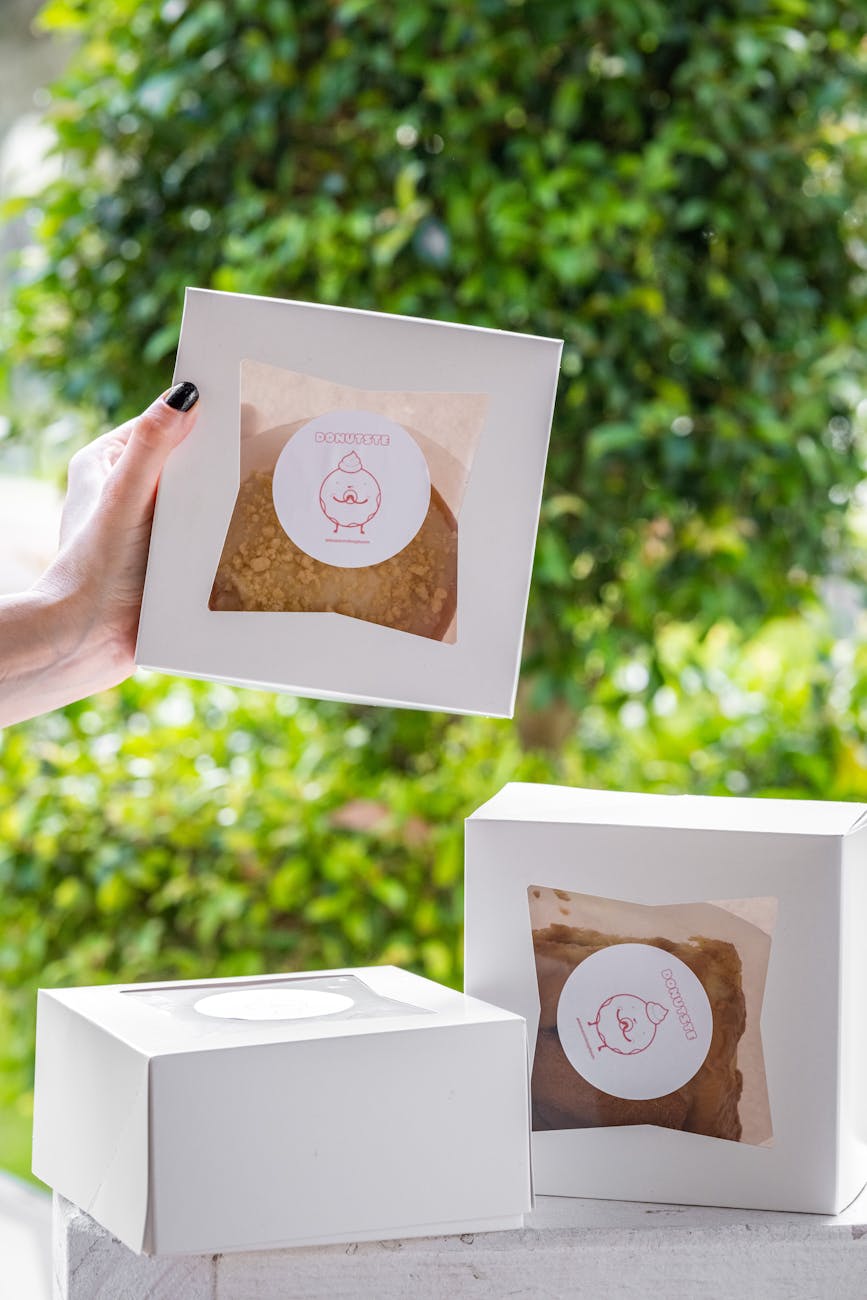
Have you ever opened a delivery that felt immediately special, even before seeing what was inside? That’s the power of great packaging. When your packaging looks professional and creative, it sends a message that you care about every detail of your small business. One of the simplest ways to achieve that “wow” factor is to use a custom logo stamp for packaging. Not only does a stamp allow you to highlight your brand identity affordably, it also helps you build memorable connections with your customers—you’ll stand out from the crowd in a friendly, authentic way.
By the end of this post, you’ll have a clear roadmap for choosing or designing a stamp, selecting the right surfaces, and stamping confidently without the usual trial-and-error headaches. If you picture yourself making a bigger splash with every order, let’s jump right in and see how a custom stamp can transform your packaging into a genuine brand statement.
Recognize the impact of branded packaging
When you invest in branded packaging, you’re essentially making your first impression on your customer’s doorstep. This glimpse into your brand can make a small moment feel extraordinary. Using a custom logo stamp for packaging is one of the most cost-effective ways to deliver that touch of personalization. It shows customers that you’re thoughtful about presentation, which in turn can inspire them to share their unboxing experience with friends or on social media.
Shift from generic to personal
A plain cardboard box or basic padded envelope might be functional, but it rarely triggers excitement. When people see your logo prominently stamped on the outside, curiosity builds instantly: “What’s inside, and who’s it from?” This simple shift from generic to personal can do wonders for customer relations and repeat business. And let’s be honest, every small business appreciates repeat orders—stamping your logo on each package encourages that much-needed brand recall.
Build a consistent brand identity
Consistency is key for building trust and recognition. You can maintain brand unity across all your materials—like your website, your social media images, and your packaging—by keeping your tone and visual style cohesive. Pursuing this level of consistency doesn’t have to break the bank. A single stamp can appear on all sorts of materials, from boxes and tissue paper to receipts and promotional inserts. If your aesthetic is minimalist, your stamp might be a simple black logo in the corner. If you’re playful, a large, colorful stamp might fit your vibe. In any case, the result is an instantly recognizable package that reminds your customer exactly who you are.
Highlight your attention to detail
Small, attention-grabbing touches can set you apart from similar businesses. A perfectly placed logo stamp shows that you’re taking an extra step in your packaging and you haven’t just tossed an item into a box. This attention to detail feels like a warm handshake, conveying that you care about how customers receive your products. The result isn’t just a shipment—it’s the start of a relationship.
Choose the right stamp design
Before you start stamping away, it’s important to nail your stamp design. After all, the final look and feel of your branded packaging depends heavily on how your logo is presented.
Evaluate your brand elements
Your logo is likely at the heart of your business identity, so you want it to transfer cleanly onto different surfaces. Ask yourself a few questions:
- Are the lines in your logo too fine for a traditional rubber stamp?
- Are there multiple overlapping colors or gradients that might not translate well to a single-color stamp?
- Do you want extra text (like your website or tagline) included in the same stamp?
If your current logo is elaborate, you might need a simplified stamp version that maintains essential brand elements but avoids intricate details. This ensures a clean result without smudges or missing lines.
Balance size and readability
Size matters—a stamp that’s too big can look overpowering, while a tiny logo might get lost on your box or envelope. Think about your most common packaging size. For small bubble mailers, it might be best to choose something compact that doesn’t crowd the surface. With larger boxes, you can go bigger, but still make sure every letter and shape is legible. Try stamping on sample packaging to see how your design fits.
Explore design variations
For some businesses, a one-size-fits-all custom stamp works perfectly. But if you frequently switch between different packaging types, you might benefit from multiple stamp sizes or designs. For instance, you could have one stamp with just your logo for the outside of packages, and another stamp with your website and social media handles for promotional inserts. When those variations echo the same brand spirit, you get a cohesive look from start to finish.
Consider working with a pro
If design isn’t your strong suit, consider reaching out to a professional or a specialized shop like Engineer Stamps (ESS). They’ve likely seen all sorts of design requests and can guide you on line thickness, stamp shape, and font selection. With their expertise, you’ll end up with a stamp that truly shines on every package you send out.
Learn key stamping techniques
Even the greatest stamp design will lose its flair if the final impression is sloppy, uneven, or smudged. Fortunately, a few basic techniques can help you master the art of stamping.
Choose the right ink
Rubber stamps can use different types of ink pads—water-based, pigment-based, or even quick-drying. Each ink type has different benefits:
- Water-based inks dry relatively quickly, offering a user-friendly choice.
- Pigment inks yield vibrant colors but may take slightly longer to dry.
- Specialty inks (like metallic or fabric inks) require more care but can really stand out.
If you ship mostly in cardboard boxes, a water-based ink pad might be all you need. For a decorative look on tissue or other delicate inserts, you might choose pigment or metallic inks.
Apply even pressure
Consistent, firm pressure ensures your design transfers smoothly. Lightly press your stamp onto the ink pad, making sure the entire surface is evenly covered. Then, place it on your packaging material in one confident motion. Rocking or rolling your stamp can cause smudges or uneven edges, so aim for a steady downward press. You may find it helps to stand up or place a small cutting mat underneath your package for better control.
Test on scrap material
Before committing your logo to 50 boxes in one go, test on a piece of similar material. You’ll be able to see if the ink color is vibrant enough, if the lines are crisp, and if any adjustments are needed. These small practice runs let you troubleshoot any issues without wasting supplies.
Clean your stamp properly
Inks can build up on the ridges of your rubber stamp over time, so cleaning is crucial. Use a damp cloth or gentle stamp cleaner to remove residue after each session. Make sure it’s fully dry before storing to avoid corrosion or warping. This slight upkeep helps your stamp stay sharp and keeps your images looking fresh at every press.
Select suitable surfaces and materials
A big benefit of a custom logo stamp for packaging is its flexibility—you can place your logo almost anywhere. From sturdy corrugated boxes to delicate tissue paper, each material adds a unique brand dimension to unboxing. That said, stamping angles, ink choices, and drying times differ, so it’s good to plan for each surface.
Corrugated boxes
Corrugated boxes are the go-to for many small businesses. They’re sturdy, they protect your items, and they’re typically a nice neutral color that offers good contrast. When you stamp on these boxes, choose a darker ink shade so your logo pops against the brown or white. Keep in mind that the ridges in corrugated cardboard can sometimes cause faint breaks in your design. Maintaining consistent pressure helps offset that, though you might not see a perfect fill on every line. If a bit of imperfection adds a rustic charm, own it—it’s part of the handcrafted appeal.
Paper mailers
Paper mailers come in lots of colors and finishes, from matte kraft to glossy poly. Matte kraft mailers pair nicely with standard water-based or pigment inks, because the ink grips well and dries quickly. Glossy or poly-style mailers can be trickier, often requiring specialty ink that adheres without smearing. Always test one mailer first. If you notice smudging, switch to a fast-drying ink or lightly scuff the surface with sandpaper to create grip (only if it doesn’t compromise the package).
Tissue paper and packing slips
Including tissue paper or custom inserts can add flair to your unboxing experience. For delicate tissues, press gently to avoid tearing or ink bleed. Also, watch your drying time—thin paper can hold onto moisture longer than cardboard. For packing slips or promotional inserts, stamping your logo near the top can remind customers whom they’re buying from and might even encourage them to share a photograph online.
Plastic or other specialty materials
You might want to stamp on plastic bags, bubble wrap, or other unusual materials. These can be a bit trickier. Plastic surfaces generally require a quick-dry solvent ink to avoid smears. If you’re aiming for an eye-catching result, consider a bright-colored ink that pops against a transparent or lightly tinted surface. When in doubt, do a test run to confirm that the ink adheres well and doesn’t wipe off as soon as you touch it.
Optimize your workflow step by step
Stamping your packaging should be fun, not tedious. The last thing you want is to spend hours in a stamping assembly line, only to discover half your stamps are crooked. A smooth workflow saves you time while maintaining quality.
Batch your materials
Instead of stamping each package the moment you need to ship it, create a batch process. Gather a day’s or week’s worth of packaging materials, then stamp them all at once. This routine makes it easier to ensure consistency. You can line up boxes or envelopes on a large table, carefully stamp each piece in a row, and let them dry as you move on to the next batch. By the time you cycle back, the ink is usually set, and you can assemble and seal without smearing.
Maintain a stamping station
Set up a small workspace or “stamping station.” Keep your stamps, ink pads, scrap paper, white towels, and a trash bin at arm’s reach. This station can be as simple as a corner table or as elaborate as a dedicated craft desk. The key is to keep everything accessible, clean, and well-organized. If you’re running an online store from home, dedicating even a small table in your living room or garage can transform a chaotic process into a manageable routine.
Use guides or templates
To help place your logo consistently, try using a positioning guide. You could cut out a cardboard frame that lines up the edges of your package with your stamp, or you could draw a light pencil outline for reference (if your packaging material allows for erasing). Some crafters tape a piece of scrap paper to the surface, leaving a rectangular cutout where the logo should go. This ensures that the final stamp location never shifts too far up, down, or sideways.
Incorporate automation if needed
If your business grows and you’re stamping hundreds of packages a day, you might consider a self-inking or pre-inked version of your stamp. This reduces the hassle of re-inking between each impression. For very large-scale operations, you can also find machine-driven stamping systems, though they’re more common in industrial settings. As your volume scales, your approach can evolve, but the custom logo stamp remains a nostalgic, personal touch that your customers will appreciate.
Infuse color for visual interest
While black ink on a kraft box is a classic, there’s no rule stating you must stick to one hue. Color is a fun, easy way to change the mood of your packaging without investing in costly colored boxes or wrapping.
Complement your brand palette
If your brand colors are vibrant, consider using those same shades in your ink pad. Imagine opening a box with your brand’s bright teal or sunny yellow logo stamped on it. That bold color can create a memorable unboxing moment. If you have a more neutral brand palette, metallic inks—like silver or gold—can add an elegant twist.
Experiment with accent stamping
Sometimes a single stamp design can be used in multiple ways. You could stamp your main logo in black or a neutral tone, then add small accent stamps in your brand’s secondary colors. If you’re launching a special product or a holiday sale, you might add a small “New” or seasonal icon stamp in a complementary color. This layering approach lets you adapt your packaging quickly to different campaigns or seasons, all while remaining cost-effective.
Manage drying times
Colorful inks, especially pigment-based ones, often need extra time to dry. If you’re stamping an entire area with multiple colors, factor in a bit of a wait so your stamps don’t smudge each other. This might mean stamping all black logos first, letting them dry, and then adding a second color pass. Remember to store or stack your packaging carefully—nobody wants a fresh stamp pressed against another surface, leaving an accidental imprint.
Prepare for cost savings and growth
When you’re running a small business, every dollar counts. Fortunately, a custom logo stamp for packaging can help you stretch your budget while still looking professional. Over time, that initial cost for design and production often pays for itself.
Compare with other branding methods
Professional printing on packaging can look great, but it typically requires bulk orders and higher minimum quantities. If you change your logo or brand messaging, you’re stuck with leftover stock. Stickers are another option, yet they can peel off, and they also require reordering to keep up with packaging volume. A well-made rubber stamp can last a long time, making it a one-time investment that adapts easily to your changing needs.
Save on storage space
Pre-printed boxes might need significant shelf space. On the other hand, plain boxes and envelopes are easier to stack in dense piles. You can keep them absent of design until it’s time to stamp. This approach helps you avoid clutter and keeps your workspace neat, especially if you operate from a smaller location like a home or a shared studio.
Scale up without losing charm
As your business grows, your packaging demands will increase. The beauty of stamping is that it remains personal, even when you’re shipping more products than ever. With a consistent stamping procedure and possibly a time-saving self-inking stamp, you can handle higher volumes without compromising your brand’s warm, handcrafted appeal.
Summarize your stamping strategy
Putting together everything we’ve discussed, here’s your formula for success:
- Design (or refine) your logo for stamp-readiness, making sure fine lines remain crisp.
- Choose the right stamp size for your most common packaging materials.
- Decide on the best ink types (water-based, pigment, metallic) for your surfaces.
- Use consistent, firm pressure for each stamp to avoid partial prints or smudges.
- Batch your packaging to streamline the entire stamping process.
- Add a pop of color to highlight certain details or align with special promotions.
- Keep the process flexible. As you grow, you can refine or expand your stamp options.
That’s all it takes to create truly memorable packaging. Whether you’re sending out five items a week or dozens per day, your stamp can give each box or envelope a personal, brand-focused twist. If you aren’t sure where to start, consider collaborating with Engineer Stamps (ESS)—they can help you design a custom stamp that captures your brand essence. Remember, when you invest time and thought into your packaging, you turn every shipment into a warm invitation, encouraging your customers to come back for more.
FAQs
Can I include my website on the same stamp as my logo?
Absolutely. Many businesses design a stamp that shows the logo plus a short URL. Just make sure your text remains legible. If your logo and website together look too crowded, consider using two different stamps.Do I need a special ink for glossy surfaces?
Glossy or poly mailers often need fast-dry or solvent-based inks to avoid smears. Water-based inks may slide around, so do a quick test first. Specialty inks typically mention if they’re suitable for slick surfaces.How does stamping compare to stickers or printed boxes?
Stickers can peel, and printed boxes can become expensive in large quantities—especially if you want to update your design. Stamps are usually a budget-friendly, flexible alternative. You can order smaller packaging stock, store it efficiently, and adapt your logo stamping to different promotions or changes in your brand.Will my stamp wear out over time?
Quality rubber stamps can last for thousands of impressions. Clean your stamp regularly to remove residual ink and keep digits or letters from clogging. Store it away from direct sunlight and high humidity, and it should remain in great shape for a good long while.Can I use multiple ink colors with one stamp?
Yes. You can tap different sections of your stamp on different colored ink pads for a multi-toned look, though it takes more time and careful alignment. Another approach is to stamp your main logo in one color, then add a smaller accent stamp in a second color.How can stamping help me stand out?
A simple stamped logo can make your brand feel friendly and personal. Customers unboxing your package will sense that extra level of care, which can lead to word-of-mouth recommendations. Consistency in branding, even on something as everyday as packaging, boosts credibility and fosters brand loyalty.
Your packaging can be the first and lasting impression your brand makes. By making the most of a custom logo stamp for packaging, you can communicate your identity, highlight your creativity, and show that you value every order that leaves your hands. With a little practice, stamping can become a quick and rewarding part of your routine—one that delights your customers from day one.


