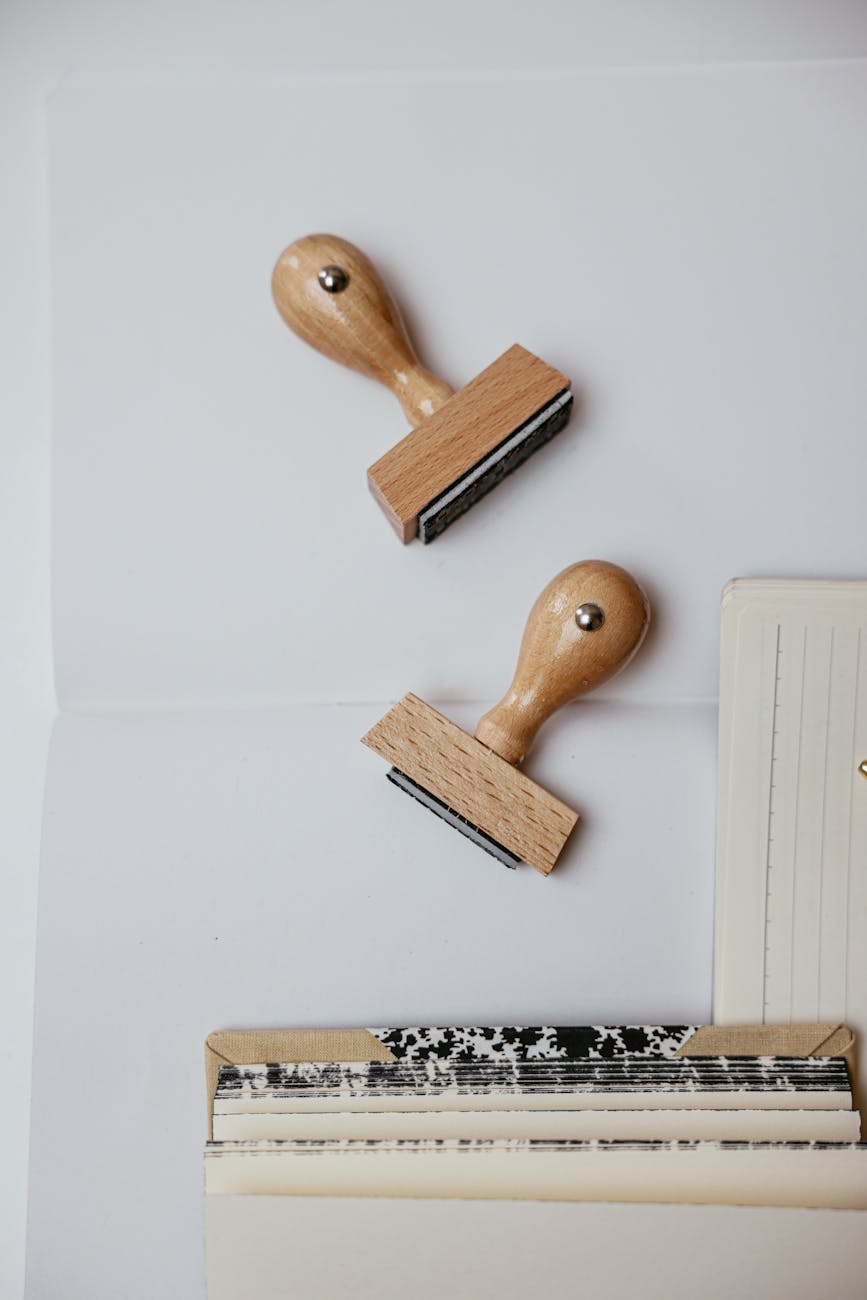
Whether you run a small business or just love crafts, there comes a time when rubber stamp pad replacement becomes unavoidable. You might notice your impressions getting faint, or that your once-crisp lines now look smudged. The good news: a hassle-free swap is easier than you might think. Below, you’ll find practical tips for selecting the right pad, performing a smooth replacement, and keeping your stamped images looking sharp for longer.
Identify when to replace
Nothing lasts forever, and rubber stamp pads are no exception. Watching for a few telltale signs helps you figure out exactly when you need a fresh replacement pad instead of continuing to struggle with half-baked impressions.
Signs your ink pad is worn
- Faded or inconsistent impressions: If each new stamp looks lighter than before and re-inking doesn’t help, your pad might have reached its limit.
- Rough or flaky surface: As a rubber stamp pad ages, it may feel scratchy or begin to crumble. This means it has lost its ability to hold enough ink.
- Ink puddles or dryness: Sometimes you’ll see tiny puddles of ink collecting in one spot while other areas dry out. This uneven distribution often indicates a pad that’s nearing the end of its lifespan.
Common mistakes to avoid
- Over-inking an old pad. Adding more ink to a pad that’s already worn out can lead to smudges and messy stamps.
- Keeping the same pad in high-traffic usage. Once you notice problems, it’s tempting to keep going “just a bit longer.” This can degrade your stamp’s quality and waste time while you aim for a clean impression.
- Forgetting to check the pad’s condition regularly. A quick glance at the ink surface before you start stamping can alert you to any upcoming problems.
Choose the right pad
Finding a viable replacement pad involves more than just picking the first option on the shelf. Each stamp pad has its own materials, size, and ink style, so a little forethought goes a long way. You’ll extend the life of your rubber stamp and consistently produce crisp images when you pick a pad suited to your unique stamping needs.
Matching ink to the material
Rubber stamp pads are available in several materials, like felt or foam. One might work better with quick-drying ink, while another is designed for water-based formulas. In general:
- Felt pads often pair well with standard water-based or pigment inks. They disperse ink evenly without soaking through too quickly.
- Foam pads can hold more ink, which is ideal for heavier stamping tasks or high-volume usage. They’re also great if you need highly pigmented results.
- Specialty surfaces (like fabric or glossy paper) might call for oil-based or solvent inks. If you’re stamping on a tricky surface, double-check that your new pad is compatible with the ink you prefer.
Sizing and shape considerations
- Pad dimensions: Always measure your stamp’s base before shopping. You don’t want a pad that’s too small, forcing you to shift the stamp multiple times, or a pad that’s consistently under-inked because the stamp barely covers it.
- Shape and design: While many pads are rectangular, some brands offer oval or round editions. These might suit specific stamp shapes or personal preferences.
- Thickness: A thicker pad generally holds more ink, so it doesn’t dry out as quickly. If you stamp frequently, or if you’re doing a larger project, a slightly thicker pad can reduce the frequency of refills.
Do a stress-free swap
When you’re ready to replace your current pad, a little preparation makes all the difference. By gathering the right supplies, removing the old pad properly, and inserting the new one with care, you’ll ensure your stamp is back in full working order.
Gather your supplies
- A new replacement pad: Make sure it’s the correct size and type for your existing stamp handle or self-inking stamp shell.
- Mild cleaning solution: A gentle, non-abrasive cleaner or mild soap and water can help clear away old ink residue.
- Soft cloth or paper towels: You’ll want something to wipe off any extra ink or debris.
- A small tool (optional): Tweezers or a thin, flat screwdriver can help pry out the old pad if it’s stuck.
Remove the old pad
- Inspect the stamp for a release mechanism. If it’s a self-inking stamp, you’ll often find a tab or slot that lets you lift the pad out.
- Gently push or slide the pad according to the manufacturer’s instructions. If it feels stuck, do not force it. Instead, wiggle it from side to side or use a thin tool.
- Carefully dispose of the old pad. Place it in the trash or follow any local guidelines if the pad contains special inks.
Clean and prep
After removing the old pad, it’s smart to clear any leftover residue.
- Use a soft cloth dipped in mild cleaning solution or soapy water.
- Wipe around the empty stamp chamber. Pay special attention to corners or crevices where dried ink might be lurking.
- Let the chamber dry thoroughly. Excess moisture can dilute new ink down the line, so make sure everything is good and dry before installing your new pad.
Insert the new pad
- Double-check your pad orientation. Some pads have a specific side that faces up to ensure the proper inking surface is available.
- Slide or snap the replacement pad into position. Again, follow the instructions from your stamp’s manufacturer to avoid any alignment mix-ups.
- Test your stamp on a piece of scrap paper. Apply gentle, even pressure to confirm you’re getting a clean result. If not, adjust the pad’s placement or ensure the ink is fully “loaded” across the surface.
Prolong your pad’s life
A replacement pad shouldn’t be a one-and-done deal if you hope to avoid frequent swaps. By exercising good storage habits and monitoring your ink carefully, you’ll get more mileage from each new pad.
Store it properly
- Keep lids and covers secure. If your stamp includes a built-in cover, close it when not in use. If you have a separate lid, put it on as soon as you’re done.
- Avoid direct heat or sunlight. These can dry out your pad and cause the plastic stamp housing to warp.
- Choose a cool, dry place. High humidity can encourage ink separation or bacterial growth, which definitely reduces pad performance.
Monitor ink levels regularly
In the hustle of daily tasks, it’s easy to forget about checking your pad until it’s too late. Make it a habit to:
- Inspect after a big stamping session. If you just processed a huge batch of invoices, glance at the pad. Does it still appear saturated and even?
- Look for skipping or uneven lines. The moment you notice a partial impression, consider adding a few drops of compatible ink or gently redistributing ink across the surface.
- Dab the corner of a clean paper towel on the pad. If you see a firm, even transfer of ink, you’re still in good shape.
Keep it running smoothly
Think of your new rubber stamp pad like a car engine that needs the occasional tune-up. With some simple self-checks and small habit changes, you can keep it stamping well for a long time.


Schedule routine maintenance
- Weekly or monthly checks: Depending on how often you use your stamp, set a short reminder on your calendar. A one-minute inspection can save you future headaches.
- Light cleaning: Every so often, wipe the edges of your stamp to clear away buildup. This prevents gunk from transferring back onto the pad during a stamping session.
- Re-inking technique: When the pad starts to dry out, add new ink sparingly. Start with a few drops in each corner, then spread it gently toward the center.
Adjust stamping technique
Sometimes, how you press the stamp affects the pad’s lifespan. A heavy hand can prematurely flatten your pad or make the ink pool in certain spots. Try:
- Using consistent pressure. Press down firmly but avoid grinding.
- Stamping on a stable surface that isn’t too soft. If your table wobbles, the pad might make uneven contact with the rubber each time.
- Rotating or moving the stamp to different parts of the pad if it’s larger than the stamp itself. This helps distribute ink usage across the pad’s entire surface.
Key takeaways
- Always recognize subtle changes in your impressions so you’ll know when to swap out an old pad.
- Choose a rubber stamp pad based on material, ink style, and the exact measurements you need.
- Clean the stamp housing before you pop in a new pad to avoid leftover grime.
- Store your stamp in a cool, dry place, and replace the cover to keep your ink fresh.
- Regular maintenance involves checking ink levels, adding small amounts of ink when needed, and using proper stamping pressure.
A successful rubber stamp pad replacement isn’t complicated, but it does call for a bit of preparation and attention to detail. By following these strategies, you’ll save time, reduce frustration, and get crisp, professional-looking impressions every time. Feel free to try out one tip today, whether it’s examining your stamp surface or stocking up on the right replacement pads. If you take a proactive approach, you’ll find that replacing your rubber stamp pad becomes a breeze instead of a chore. Happy stamping!